How to Insert Your Own Images into Golpo AI Videos — A Step-by-Step Guide
A complete walkthrough of Golpo AI's "User Created Videos and Images Insertion" feature. Learn how to upload product photos, choose between still and animated display, edit the generated script with image markers, and produce a polished video ad — all in minutes.

Updated October 14, 2026.
How to Insert Your Own Images into Golpo AI Videos — A Step-by-Step Guide
Golpo AI's "User Created Videos and Images to be Inserted in the Video" feature lets you upload your own photos and blend them into AI-generated whiteboard animations. But how exactly does it work? What do the settings look like? How do you control where each image appears?
In this guide, I'll walk you through the entire process — step by step, with screenshots — by creating a product advertisement video for a handbag. By the end, you'll see exactly how to go from a few product photos to a polished video ad.
What We're Building
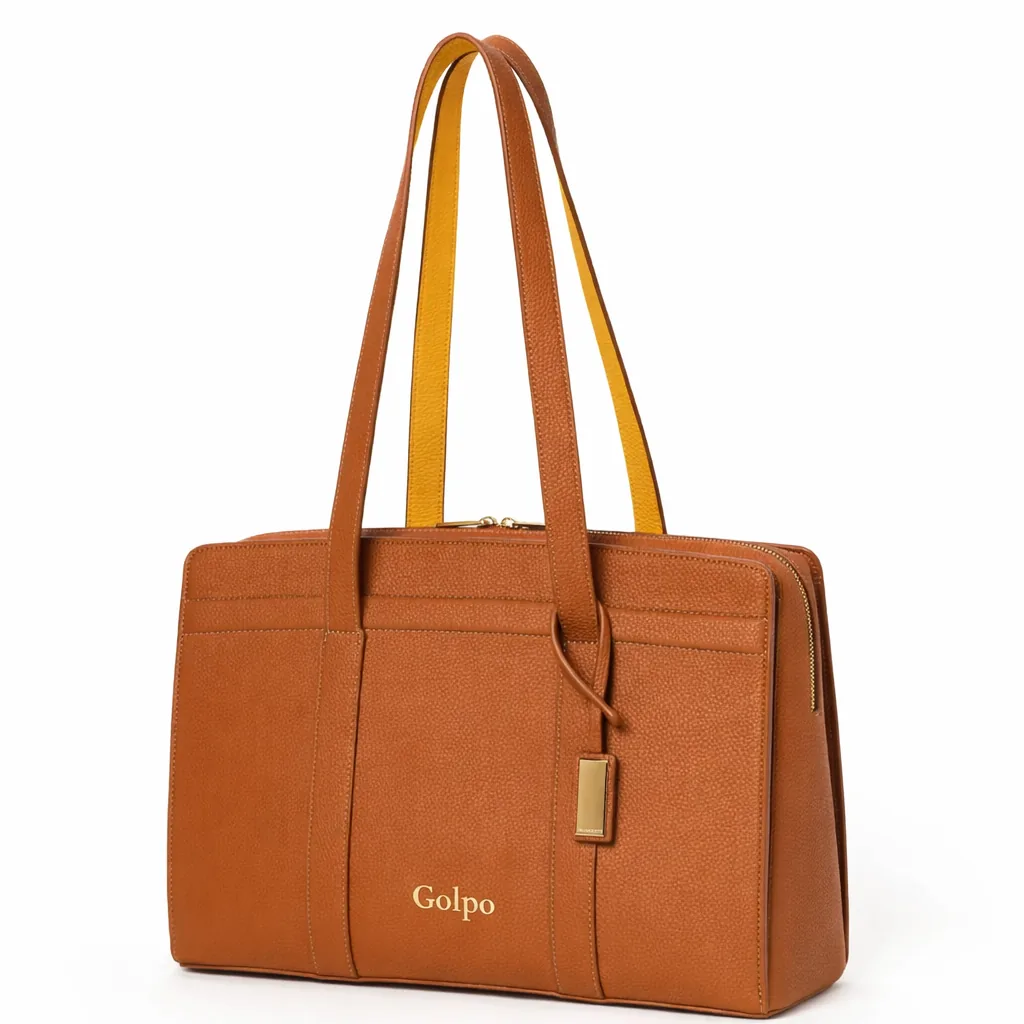
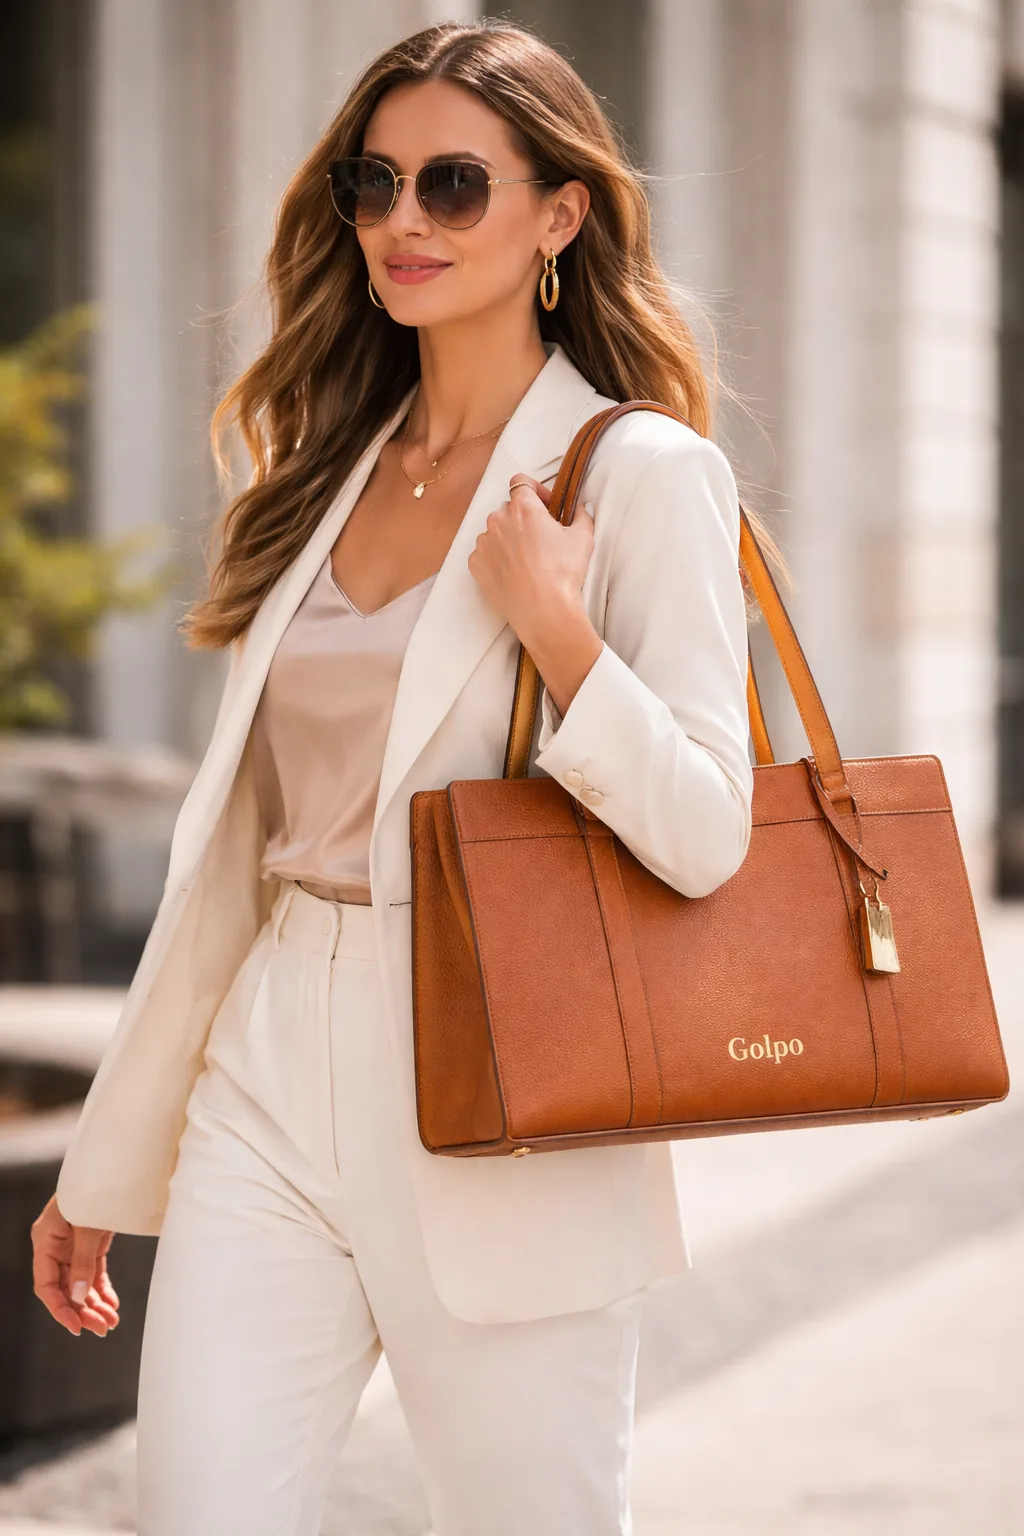
Let's say you want to create a short video ad for a product — in this case, the Golpo Bag, a stylish leather handbag priced at $150. You have three images:
- A product shot of the bag itself
- A lifestyle photo of a woman carrying the bag
- A brand splash screen with the Golpo Bags logo
That's it. Three images and an idea. Let's turn them into a video.
 Step 1 — Open the Create Video Page and Enable Image Insertion
On the Golpo AI Create Video page, you'll see two options below the animation style selector: "User created videos and images to be inserted in the video (Beta)" and "Record screen (with audio) (Beta)."
Click on "User-created videos and images to be inserted in the video (Beta)" to enable the image upload feature.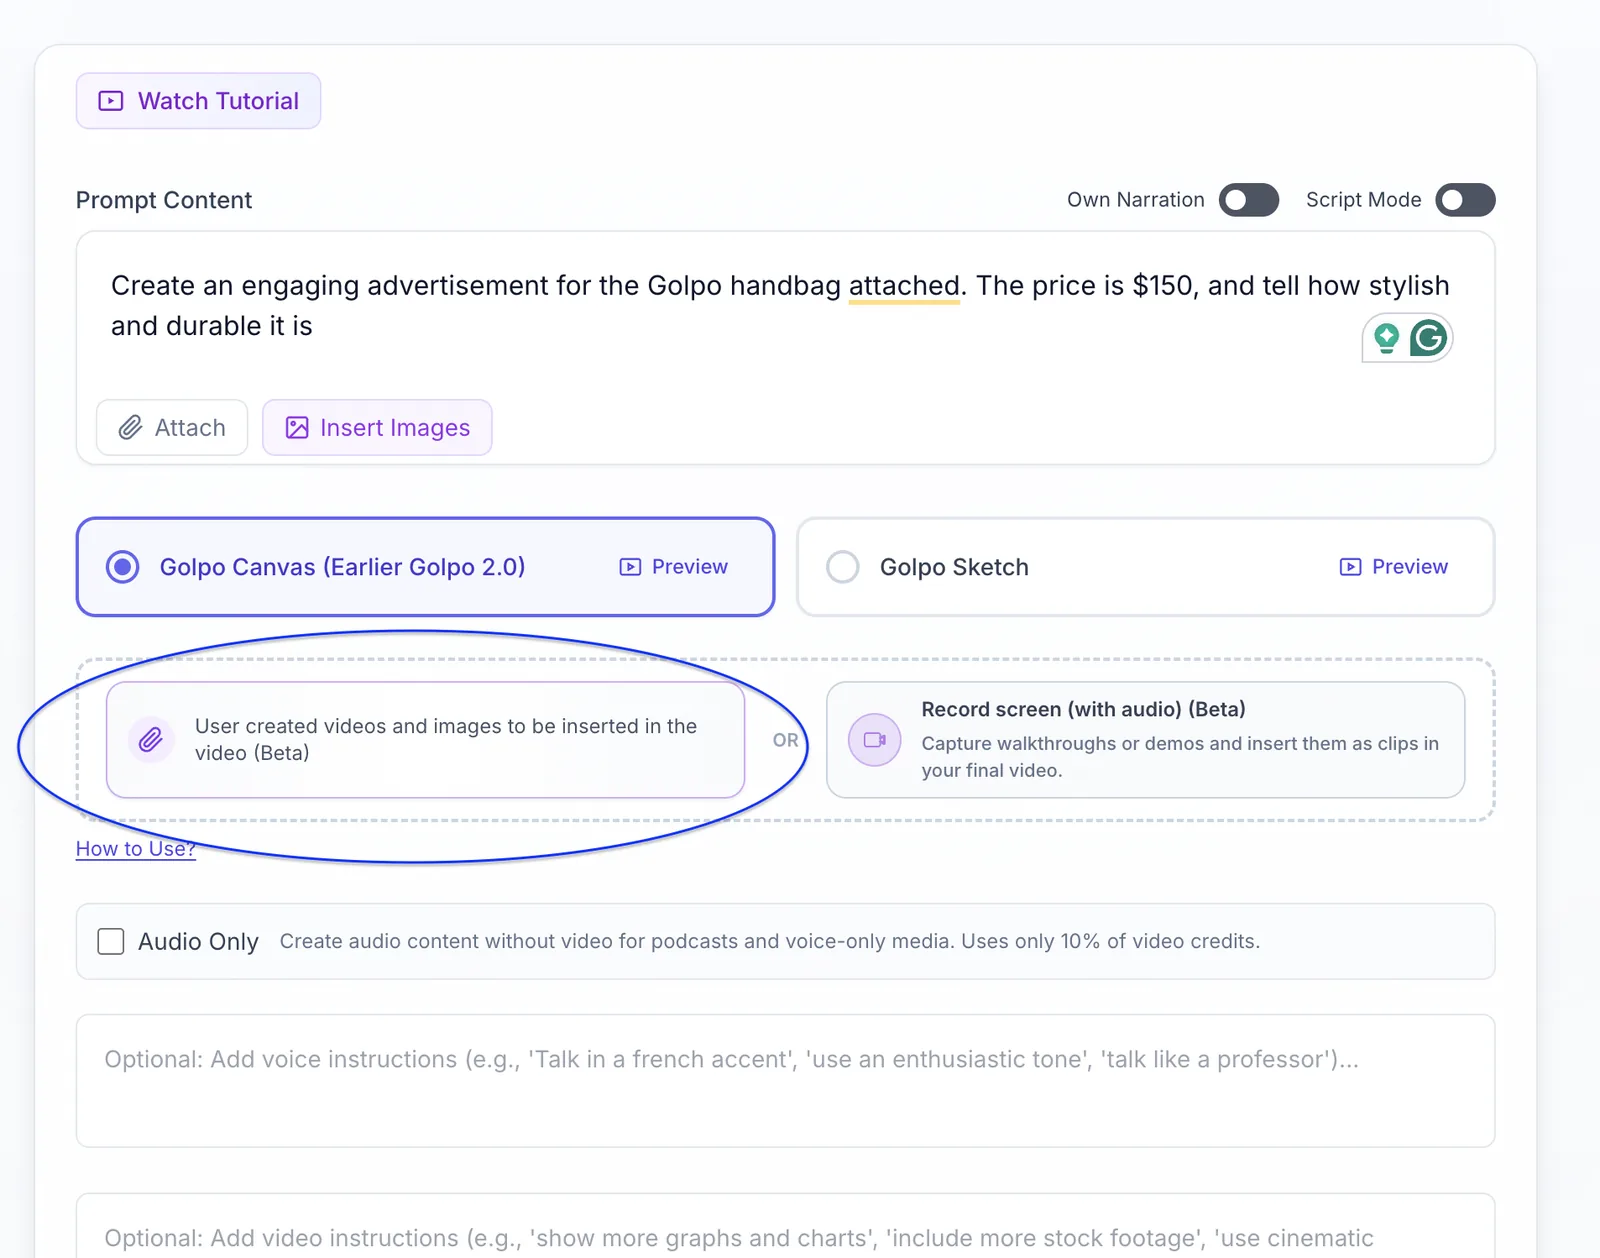 You'll also notice there's now an "Insert Images" button next to the Attach button in the prompt area. This is what you'll use to upload your photos.
Step 2 — Write Your Prompt
In the Prompt Content field, describe what you want the video to be about. For our handbag ad, the prompt is:
"Create an engaging advertisement for the Golpo handbag attached. The price is $150, and tell how stylish and durable it is"
This gives Golpo the context it needs to generate a script and narration that matches your product. You don't need to write a full script — just describe what you want and Golpo will craft the narrative.
Step 3 — Upload Your Images and Configure Each One
Now click "Insert Images" and upload your photos. This is where it gets interesting — for each uploaded image, you get to make two important choices:
- Still vs. Animated: Do you want the image to appear as-is, or do you want Golpo to apply AI animation to it?
- Description: A short note telling Golpo what the image is, so it knows how to reference it in the script
Here's how I configured the three images:
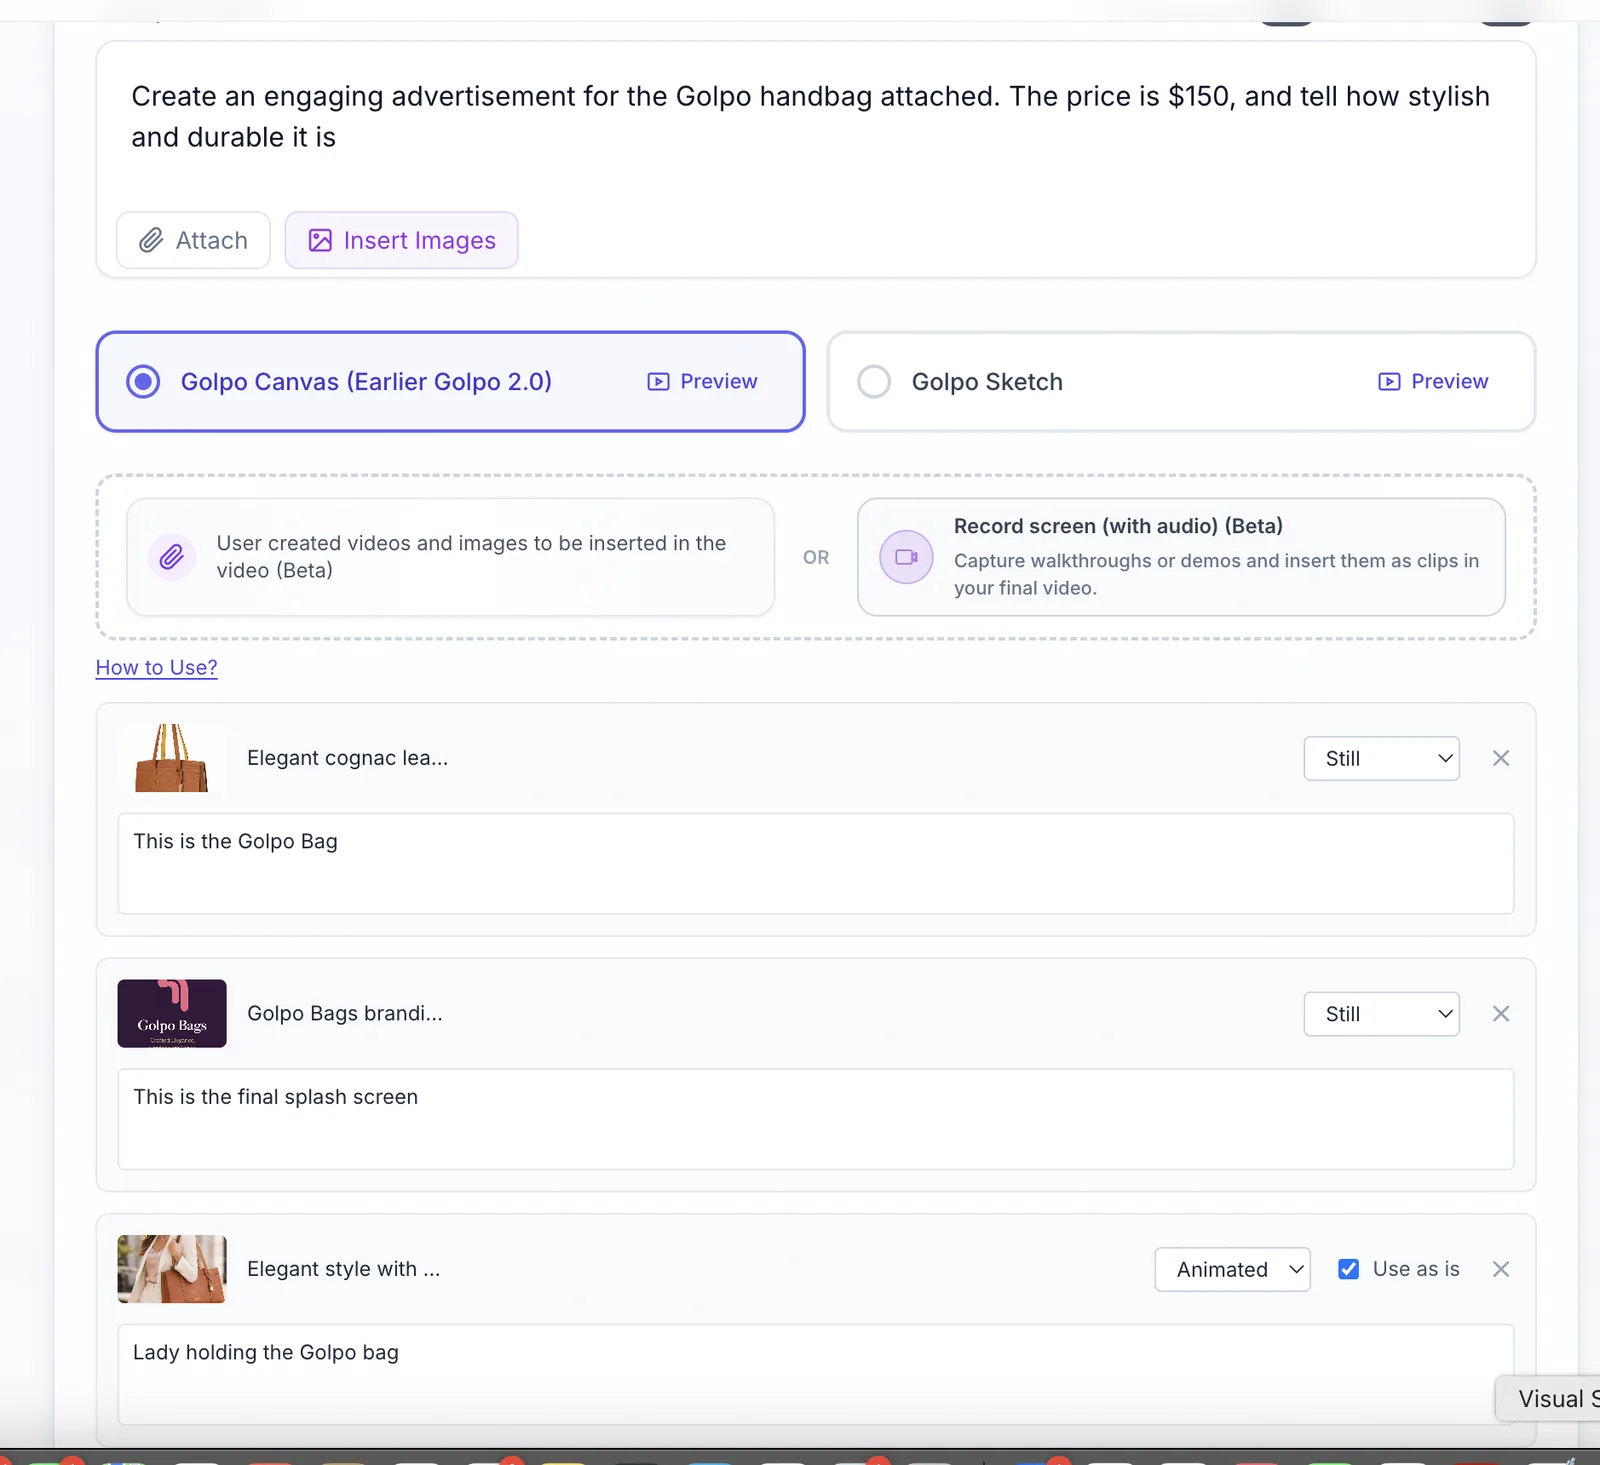
Image 1 — The bag product shot: Set to Still, with the description "This is the Golpo Bag." I want the actual product photo to appear exactly as-is so buyers see the real bag.
Image 2 — The brand splash screen: Set to Still, with the description "This is the final splash screen." The logo card should appear clean and unaltered at the end.
Image 3 — The lifestyle photo: Set to Animated with
"Use as is" checked, and the description "Lady holding the Golpo bag." I chose animated here to add some visual movement to the lifestyle shot while keeping the original photo intact.
Why the descriptions matter: If you don't describe your images, Golpo will use its own interpretation. Adding a short description ensures the AI references your images correctly in the narration. For example, tellingit "This is the final splash screen" prevents Golpo from trying to narrate over the logo card.
Step 4 — Choose Your Video Settings
Below the image uploads, you'll find the video configuration options. For this ad, I used
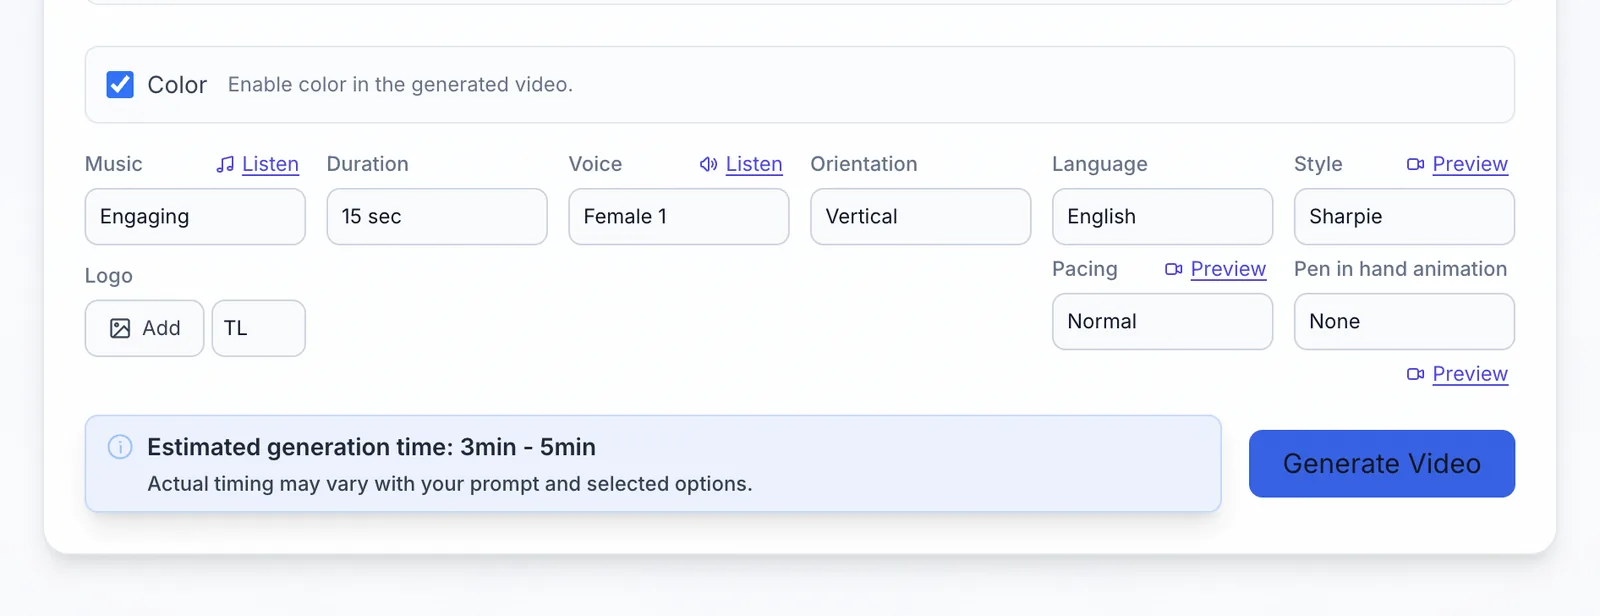
- Color: Enabled — adds color to the whiteboard animation
- Music: Engaging — upbeat background music for a product ad
- Duration: 15 seconds — short and punchy for social media
- Voice: Female 1 — clear, professional narration voice
- Orientation: Vertical — perfect for Instagram Reels, TikTok, or YouTube Shorts
- Language: English
- Style: Sharpie — a bold whiteboard drawing style
- Pacing: Normal
- Pen in hand animation: None
The estimated generation time shows 3–5 minutes. That's all it takes.
Step 5 — Generate the Script (Optional but Recommended)
Here's a tip: check the "Edit script before creating video" option. This generates the script first so you can review and adjust it before the final video is created.
When you do this, Golpo produces a script with image markers that show exactly where each uploaded image will appear. Here's what the generated script looked like for the Golpo Bag ad:
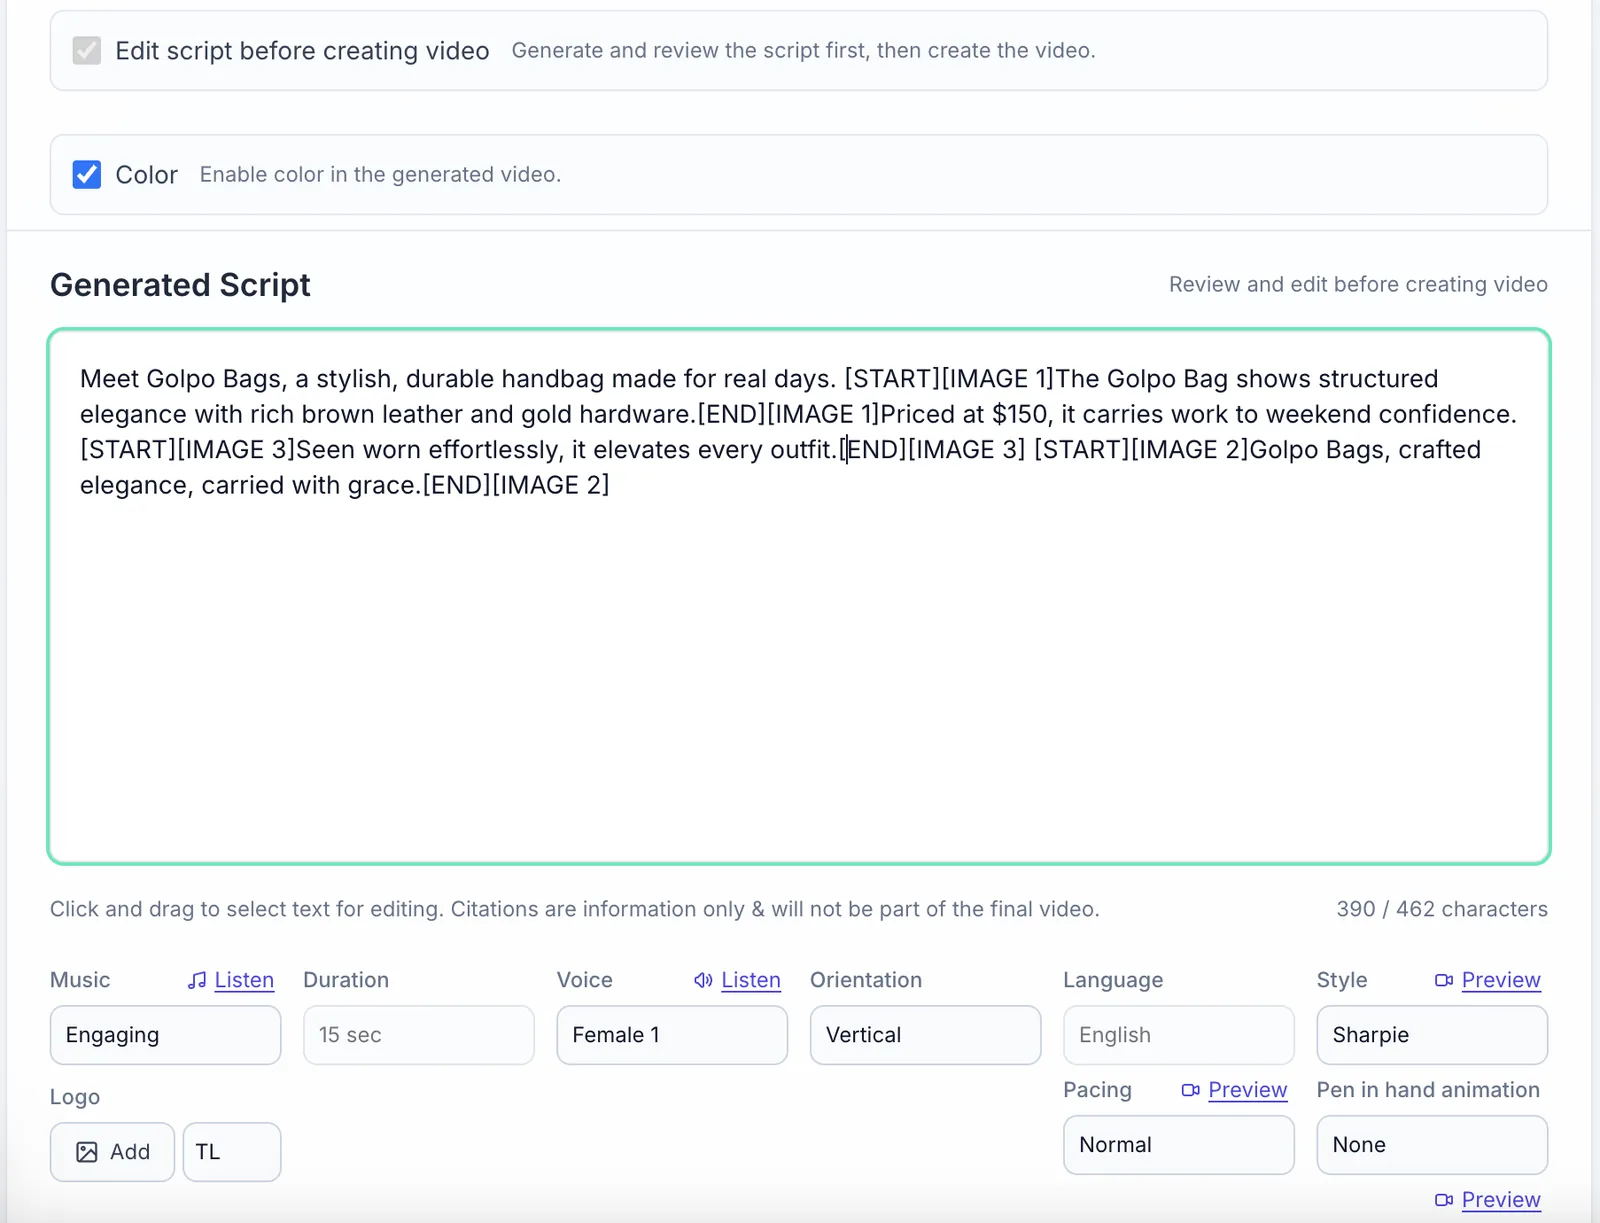
The script reads:
"Meet Golpo Bags, a stylish, durable handbag made for real days. [START][IMAGE 1]The Golpo Bag shows structured elegance with rich brown leather and gold hardware.[END][IMAGE 1] Priced at $150, it carries work to weekend confidence. [START][IMAGE 3]Seen worn effortlessly, it elevates every outfit.[END][IMAGE 3] [START][IMAGE 2]Golpo Bags, crafted elegance, carried with grace.[END][IMAGE 2]"
Understanding the Image Markers
The markers work like this:
- [START][IMAGE 1] and [END][IMAGE 1] — Everything between these tags is narrated while Image 1 (the bag product shot) is displayed on screen
- [START][IMAGE 3] and [END][IMAGE 3] — The lifestyle photo appears while this section is narrated
- [START][IMAGE 2] and [END][IMAGE 2] — The brand splash screen shows during the closing line
The image numbers (1, 2, 3) correspond to the order you uploaded them — Image 1 is the first upload (bag photo), Image 2 is the second (splash screen), and Image 3 is the third (lifestyle photo).
You can edit this script freely. Want the lifestyle photo to appear earlier? Move its markers. Want to change the narration? Edit the text between the tags. Want an image to show for a longer portion? Expand the text between its START and END markers. You're in full control.
Step 6 — Generate the Video
Once you're happy with the script, hit "Generate Video" and wait a few minutes. Golpo combines the whiteboard animation, your uploaded images (displayed as still or animated per your settings), the AI narration, and background music into a single polished video.
The Final Result
Here's the finished product — a 15-second vertical video ad for Golpo Bags, created entirely from three photos and a one-line prompt:
The product photo appears cleanly as a still image when the bag is being described. The lifestyle shot shows the bag being carried, with subtle animation. The brand splash screen closes the video. All tied together with professional narration and engaging music.
From three photos to a video ad — in under five minutes.
Here is the video of the whole process:
This video is created using the "Record Screen" feature of Golpo AI to show the end-to-end process of inserting images in action.
Quick Reference: Still vs. Animated
Choosing between Still and Animated for each image is one of the most useful controls in this feature. Here's when to use each:
- Use Still when: You want the image to appear exactly as-is — product photos, logos, splash screens, charts, or any image where clarity and accuracy matter
- Use Animated when: You want Golpo to add visual movement — lifestyle photos, scenes, environments, or any image that benefits from a sense of motion. Check "Use as is" if you want animation applied to the original photo, or leave it unchecked to let Golpo interpret and redraw it
Tips for Best Results
- Always add descriptions to your images. A short note like "This is the product" or "This is the closing logo" helps Golpo place and reference them correctly in the narration.
- Use "Edit script before creating video" so you can see exactly where your images land and adjust before committing to the final render.
- Match the orientation to the platform. Use Vertical for Instagram Reels, TikTok, and YouTube Shorts. Use Horizontal for YouTube, website embeds, and presentations.
- Keep the duration short for ads. 15–30 seconds works best for product ads on social media. You can go longer for explainers or tutorials.
- Use the description field in images to guide the narrative. If you label an image as "final splash screen," Golpo won't try to describe it — it'll use it as a closing visual.
What You Can Create with This
This same workflow applies to any scenario where you have images and want a narrated video:
- Product ads: Upload product photos and lifestyle images for e-commerce video ads
- Real estate listings: Insert property photos for home-for-sale videos (we showed this in our previous post)
- Restaurant menus: Upload food photos and let Golpo create a narrated menu showcase
- Portfolio presentations: Insert your best work samples into a narrated reel
- Event invitations: Upload venue and speaker photos for event promo videos
- Employee onboarding: Insert company photos for personalized training videos
Available Plans
This feature is only available in the Golpo Business and above plans.
Final Thoughts
The image insertion feature in Golpo AI is straightforward once you understand the workflow: upload images, describe them, choose still or animated, write a prompt, and generate. The script editor with image markers gives you precise control over when and how each image appears.
The fact that you can go from a handful of photos to a professional video ad in under five minutes — with narration, music, and animation — makes this a practical tool for anyone who needs video content but doesn't have the time or budget for traditional production.
Related feature guides
- Create a Custom Style in Golpo Canvas — use an image as art-direction inspiration across every scene.
- Frame-by-frame video editing guide — replace or refine individual scene visuals after generation.
- Golpo pricing breakdown — compare inserted-media and editing availability across plans.
Try it with your own product photos, property listings, or any images you want to bring to life.


