How to Map Sentences to Scenes in Golpo Before Video Production
Use Golpo's Custom scenes and sentence selection feature to review the automatic scene map, move sentence boundaries, combine or split scenes, and choose the final scene count before production begins.

How to Map Sentences to Scenes in Golpo Before Video Production
Golpo can now show you how your script will be divided into scenes before production starts. With Custom scenes and sentence selection, you begin with Golpo's automatic scene map and then decide which sentences should stay together, where a new scene should begin, and how many scenes the final video should use.
This gives you control over the video's visual rhythm before the illustrations, narration timing, and transitions are generated. Instead of discovering an awkward scene break after the full video is finished, you can fix the structure first.
Watch the scene-selection workflow
This walkthrough shows the complete pre-production flow: open the scene map, inspect the suggested grouping, combine one scene, move a boundary between sentences, save the new map, and continue with the customized scene count.
Open the scene-selection walkthrough in the Golpo player →
Why sentence-to-scene mapping matters
A scene is more than a container for words. It controls which part of the narration shares one visual idea. A useful scene map helps the video feel intentional:
- Give an important line its own scene when it needs emphasis or a visual reveal.
- Combine short, closely related sentences when they should play as one smooth moment.
- Split a crowded scene when it contains too many ideas for one visual composition.
- Keep setup and payoff together when separating them would make the story harder to follow.
- Improve transitions and subtitle timing by placing scene boundaries at natural changes in thought.
The feature does not make you plan every scene from scratch. Golpo creates the first map. You only reshape the parts that need a different pace, grouping, or emphasis.
How to customize scenes before production
- Add your script and choose the main video settings. Paste or write the script, then select the video type, duration, voice, orientation, language, style, pacing, and any other options you want.
- Enable “Custom scenes and sentence selection.” The option appears with an Edit sentences button and the current total scene count.
- Select “Edit sentences.” Golpo opens the Build your scene map screen and displays its automatic scene suggestion.
- Review the proposed structure. Use the numbered scene tabs and scene cards to check each sentence range, estimated scene duration, sentence count, and word count. Golpo also displays the maximum number of scenes supported for that script and engine.
- Change the total scene count if needed. Use the minus and plus controls. You can reorganize the map within the engine maximum shown on screen. In this example, Golpo's maximum was 14 scenes and the final map used 12.
- Move sentence boundaries. Drag the divider between sentence rows, drag an individual sentence into another scene, or use First sentence and Last sentence on a scene card to shift its boundary.
- Split or combine scenes. Use Split scene, Combine prev., or Combine next. The screen also provides Auto-balance, Undo, and Reset.
- Check the map before saving. Confirm that every sentence is assigned. Review any Long scene labels and make sure each scene contains one coherent visual beat.
- Select “Save scene map.” Back on the main settings screen, confirm the revised number beside Total scenes.
- Continue to production. Select Continue with 12 Scenes—or the count shown for your map—and complete the remaining confirmation steps.
Worked example: reducing 14 suggested scenes to 12
The example script contains 43 sentences. Golpo's engine allowed a maximum of 14 scenes, but the final map was reduced to 12. Short connected beats were grouped together, while major reveals were kept separate.
| Scene | Sentences | Starts with | Ends with |
|---|---|---|---|
| 1 | 1–2 | September 27, 1969, began as a quiet Saturday at Lake Berryessa, north of Napa. | College students Bryan Hartnell and Cecelia Shepard had driven out to the lake to relax. |
| 2 | 3–5 | They sat together near the shoreline, talking in the afternoon sun. | Then Cecelia noticed someone watching them. |
| 3 | 6–7 | A man was moving toward them from a distance. | At first, there was nothing especially frightening about him. |
| 4 | 8–11 | But he disappeared behind a tree. | Over his chest was a white symbol: a circle crossed by two lines, like the sight of a gun. |
| 5 | 12–16 | In his hand was a pistol. | He had even brought pieces of clothesline already cut to length. |
| 6 | 17–26 | He ordered Cecelia to tie Bryan's hands. | He stabbed her again and again before calmly walking away. |
| 7 | 27–29 | But the strangest part came next. | On the passenger door, he wrote the dates of earlier Bay Area attacks, drew the same crossed-circle symbol from his costume, and added: |
| 8 | 30–34 | “Sept 27 69” | Later that evening, a man called the Napa Police Department from a pay phone. |
| 9 | 35–38 | He reported the attack himself and told police where to find the victims. | Cecelia Shepard, only 22 years old, died two days later. |
| 10 | 39 | Investigators connected the attack to the mysterious killer who had already been sending coded letters to Bay Area newspapers under a name that would become infamous: | Same sentence |
| 11 | 40–42 | The Zodiac. | Despite one of the most extensive and famous murder investigations in American history, the Zodiac's confirmed identity has never been established. |
| 12 | 43 | More than half a century later, that hooded figure walking toward two students beside a quiet California lake remains one of the Bay Area's most chilling unsolved mysteries. | Same sentence |
Watch all 12 scenes with the active sentence map
The player below adds a synchronized guide layer to the finished video. As each sentence is spoken, it shows the active scene, that scene's sentence range, the current position in the 12-scene map, and the exact sentence number out of 43.
Open the original, unannotated video in the Golpo player →
How to review the saved scene map later
The scene map remains visible after production:
- Open your Library.
- Open the settings for the relevant video card.
- Select View Configuration.
- Find Custom Scene Selection. The row displays the saved count, such as 12 scenes configured.
- Expand the row to review every scene's sentence range and its starting and ending sentence.
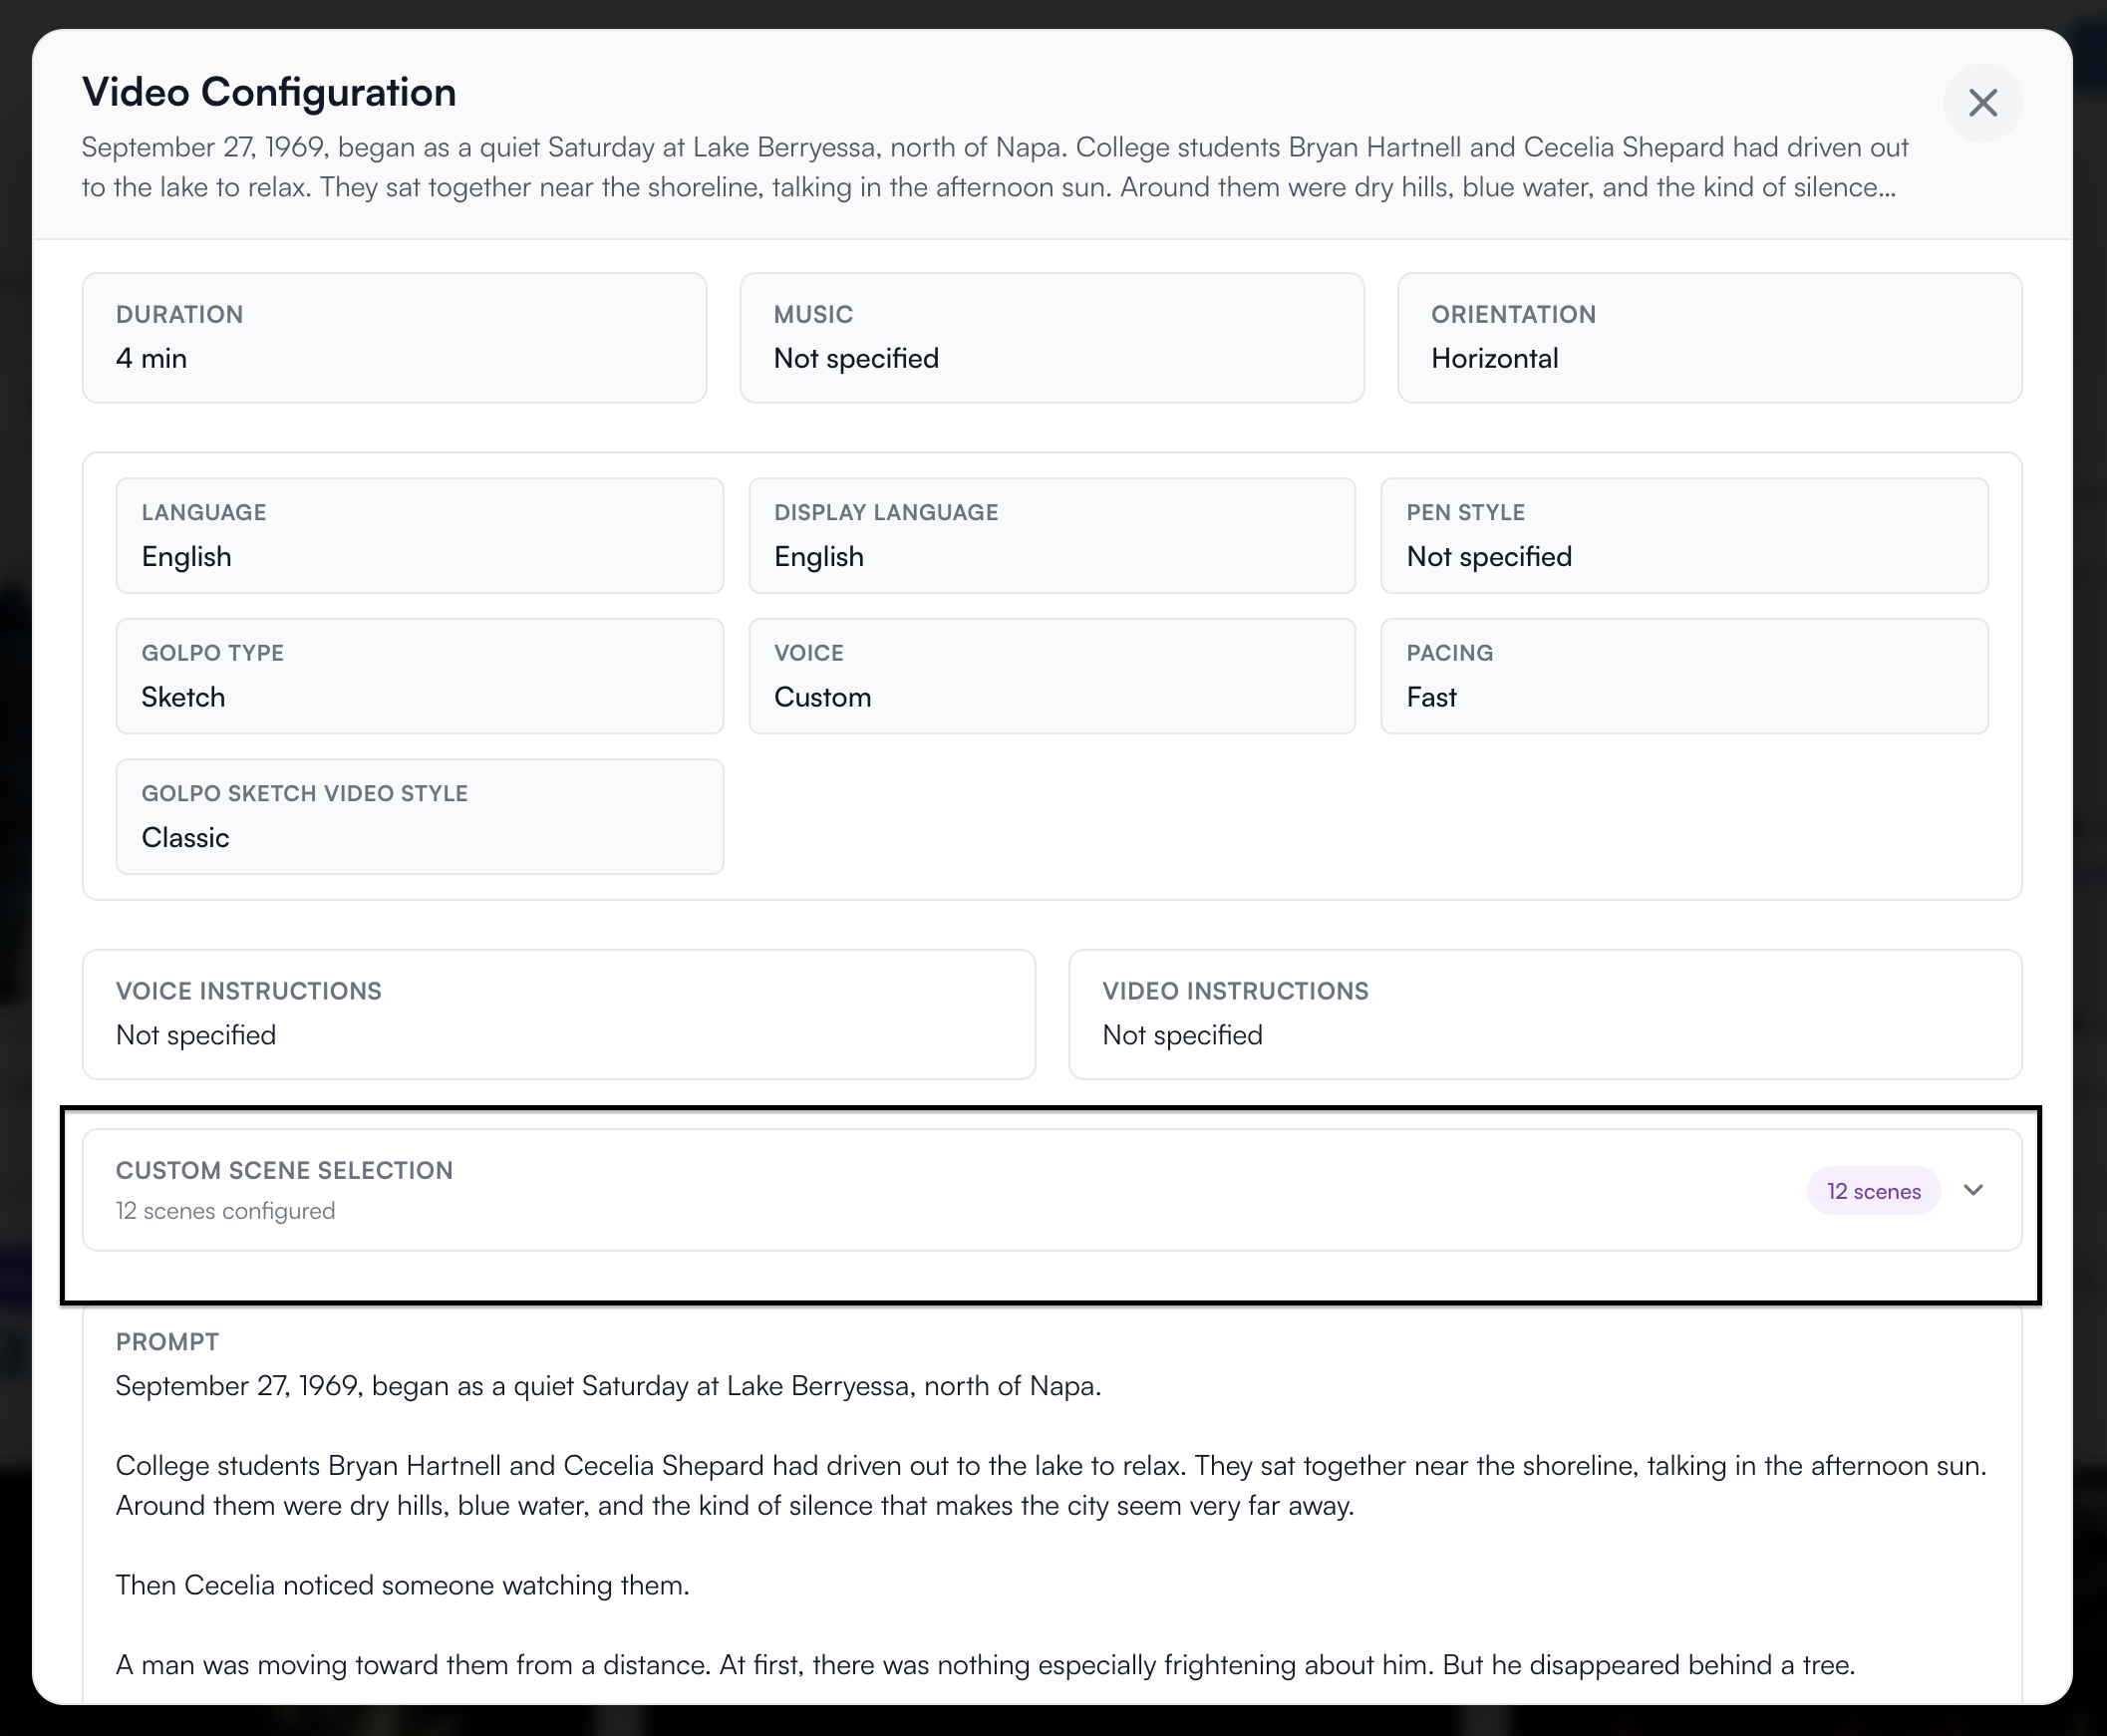
This makes the finished video's structure easy to audit. You can confirm that production used the intended 12-scene map without reconstructing the decisions from the final playback.
Practical scene-mapping tips
- Read for meaning, not equal length. Two scenes do not need the same number of sentences if one idea deserves more time.
- Use a separate scene for a reveal. In the example, “The Zodiac.” begins its own scene so the name lands with emphasis.
- Watch the estimated duration. A long scene can work, but it should contain one coherent idea that can support a sustained visual.
- Keep connected details together. Group context, action, and consequence when one visual can explain them more clearly than several rapid cuts.
- Check every boundary once. Read the last sentence of one scene and the first sentence of the next. The change should feel deliberate.
- Use Undo before Reset. Undo is useful for a single unwanted move; Reset returns to the original suggested map.
Frequently asked questions
What does Custom scenes and sentence selection change?
It changes which existing script sentences belong to each scene and how many scenes the video uses before production. The scene-map screen does not rewrite the sentences.
Do I have to build every scene manually?
No. Golpo creates an automatic scene map first. You can keep it, use Auto-balance, or change only the boundaries that need attention in the embedded walkthrough.
Can I choose any number of scenes?
You can change the count within the limit shown in the scene-map screen. Golpo displays the engine maximum. In the worked example, that maximum was 14 and the saved map used 12 scenes.
Can I move one sentence without rebuilding the map?
Yes. Drag an individual sentence into another scene, drag the divider between sentence rows, or use the boundary controls on the selected scene card. The first embedded MP4 shows these controls in use.
Can I undo changes?
Yes. The scene-map screen includes Undo and Reset, as well as Auto-balance.
Where can I see the saved scene map after the video is created?
Open the video's card in the Library, open its settings, choose View Configuration, and expand Custom Scene Selection. See the configuration screenshot and exact steps.
Related guides
- How to turn a finished script into a Golpo video
- How to write an explainer video script
- How to guide scene structure with Video Instructions
- How to edit a Golpo video after generation
- Prompt Mode vs Script Mode in Golpo
- Browse all Golpo guides
Custom scenes and sentence selection moves an important creative decision earlier in the workflow. Golpo still gives you an automatic starting point, but you can now approve the story's scene structure before production begins.


